
The Bike Room Builder is a revolutionary tool that allows you to design your own custom bike storage room within minutes. The program allows users to create their own 3D model of their dream bike room simply by dragging and dropping components into place.
While its easy to get started on your own, we want to provide you with this guide to show you everything the Bike Room Builder can do!
Opening up a file
To access the Bike Room Builder, log onto our website and select the Bike Room Builder tab on our home page banner.
Alternatively, you can access the builder by selecting a bike storage product.
Please note that you will have to log in to access the Bike Room Builder, but it’s free to create an account and you can use it at any time.
Once you’re logged in, you can start a new project or resume an existing one. Keep in mind that you can only have one project saved per account at a time. If this is your first time using the Builder, select START A NEW PROJECT.
Room builder page layout
Toggling views
The bike room builder defaults to the 2-D view and starts off as a 10’ x 10’ square shaped room. You can toggle between views by clicking on the ![]() buttons.
buttons.
Note that any and all edits made to the bike room must be done in 2-D view, and the 3-D view is strictly for viewing the models.
Condensed guide
At the top right-hand corner of the bike room display window, you can click on the ![]() icon. This opens up a condensed how-to guide for using the bike room, which covers basic controls and features.
icon. This opens up a condensed how-to guide for using the bike room, which covers basic controls and features.
Creation menu
To the right of the bike room display window are your main customization controls.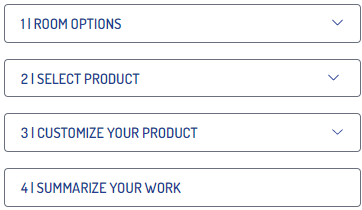
We’ll go over each of these options in more detail a little further down.
Zooming in and out of the Bike Room display
At the bottom of the bike room display window, you can zoom in or out of the display by clicking on the ![]() buttons.
buttons.
You can also use the scrolling wheel on your mouse if the cursor is inside of the window or use 2 fingers on your trackpad to move in or out.
Undo button
Next to the zoom in and out buttons is the ![]() button, which allows you to take back your most recent edits to the bike room walls. Note that you can only undo edits made in this session, and if a saved bike room is loaded, you can’t undo any changes made in previous sessions.
button, which allows you to take back your most recent edits to the bike room walls. Note that you can only undo edits made in this session, and if a saved bike room is loaded, you can’t undo any changes made in previous sessions.
Toggling Dimensions and Collision boxes
To the right of these controls are two toggles: ![]()
Toggle the “See dimensions” switch to make the dimensions of your room appear or disappear in the bike room viewing window. We'll take a closer look at the “collision box” toggle once we have begun to put bike products into the room.
Saving your project
Directly below the toggle switches is the ![]() button, which allows you to save your project and return to it later.
button, which allows you to save your project and return to it later.
As mentioned above, you can only save one project per account at a time, and your saved room remains saved for 30 days after your last update to the room.
Because the bike room does not save automatically, you will need to press this button any time before you log out in order to keep your progress, updates, and changes. Frequently save your bike room as you go along so you don’t lose all of your progress if you lose your internet connection unexpectedly.
Room options
Inputting wall dimensions
![]()
Use the room options tab to input your room dimensions.
Don’t worry if your room isn’t rectangular in shape, this is just a starting point for your general room size.
.png?width=210&height=61&name=Screenshot%20(62).png)
You have the option to enter the room width and room length in either feet or inches by toggling between the two options in the input box. You must press the “enter” or “return” key after entering each input in order for it to take effect.
After these dimensions have been input, you can begin to manipulate the room further, but note that once other aspects of the room begin to change, the dimensions input into this box will be unable to be changed.
Adding additional walls
Once you have the basic width and length of your room input you can click on each individual wall to make a group of icons appear.
.png?width=153&height=233&name=Screenshot%20(90).png)
The ![]() icon allows you to split the wall into two segments, creating an additional wall that can be manipulated by dragging the
icon allows you to split the wall into two segments, creating an additional wall that can be manipulated by dragging the ![]() button by clicking and holding the left mouse button and moving the mouse. Similarly, pre-existing walls can be altered and manipulated using the
button by clicking and holding the left mouse button and moving the mouse. Similarly, pre-existing walls can be altered and manipulated using the ![]() button.
button.
You can continue to segment the wall into as many pieces as you need.
If you want to remove the newly created wall, simply click on the ![]() button at the corner of a wall and then the
button at the corner of a wall and then the ![]() icon.
icon.
Adding a curved wall
Next, we will be looking at how to create a curved wall. Begin by left clicking on the wall you want to be curved and selecting the ![]() icon.
icon.
You will notice that once you click on the ![]() icon,
icon, .png?width=104&height=62&name=Screenshot%20(61).png) will auto-populate to the smallest number that the curve radius could be.
will auto-populate to the smallest number that the curve radius could be.
Enter your desired curve radius, and you will see the room instantly transform.
Unlike the Room Width and Room Length entries, you can change your measured Curve Radius on each individual wall.
If you want to create another curved wall with a different radius, simply repeat the process.
Wall mounted products selection
The ![]() icon allows you to open up the wall mounted product selection guide. We will cover product selection a little further down.
icon allows you to open up the wall mounted product selection guide. We will cover product selection a little further down.
Wall drag functionality
If you want to adjust multiple walls at once, select the ![]() icon after clicking on the wall adjoining the two you want to lengthen or shorten. When
icon after clicking on the wall adjoining the two you want to lengthen or shorten. When ![]() appears, left-click, hold, and drag the wall to your desired position. Once you let go of the mouse button, the wall will be in its new position. If you want to adjust the wall again simply repeat this process.
appears, left-click, hold, and drag the wall to your desired position. Once you let go of the mouse button, the wall will be in its new position. If you want to adjust the wall again simply repeat this process.
Select Product
![]()
When you’re ready to begin adding products to your room, click on the Select Product option on the menu to the right of the bike room viewer.
Product Options
Once you open the menu, you will see 3 separate tabs:
.png?width=359&height=317&name=Screenshot%20(64).png)
![]() are products that have the option to attach to a wall through wall mounting. You can also choose non-wall mounted options for some of these products, but because they are primarily mounted to a wall they are included in this category. You can also access the wall products menu by left-clicking on a wall and selecting the listing icon.
are products that have the option to attach to a wall through wall mounting. You can also choose non-wall mounted options for some of these products, but because they are primarily mounted to a wall they are included in this category. You can also access the wall products menu by left-clicking on a wall and selecting the listing icon.
![]() houses all of our products designed to be either in-ground mounted or surface mounted to the floor of the bike room. This includes bike racks, bike lockers, multi-tier bike storage solutions, and other bike room amenities.
houses all of our products designed to be either in-ground mounted or surface mounted to the floor of the bike room. This includes bike racks, bike lockers, multi-tier bike storage solutions, and other bike room amenities.
![]() houses some general space blockers that you can use to better represent your room. We feature both doors and windows that can be used to annex off parts of the room for use, as well as 2’ x 2’ columns that can be used to indicate any other type of barrier present in the room.
houses some general space blockers that you can use to better represent your room. We feature both doors and windows that can be used to annex off parts of the room for use, as well as 2’ x 2’ columns that can be used to indicate any other type of barrier present in the room.
Placing and orientating products and barriers in the room
To place your chosen product into the room, you can either click the ![]() button below the product or drag and drop the product into the room.
button below the product or drag and drop the product into the room.
If you have ![]() toggled on you should see a blue box around each of your products.
toggled on you should see a blue box around each of your products.
.png?width=209&height=69&name=Screenshot%20(51).png)
This shows the amount of space needed around a product to have it operate properly. Note that when creating aisles, the collision box of a given product will account for half of the space needed for an aisle.
Products cannot be placed within the collision box of another object, and instead will be moved to the closest possible location.
To move your product around in the room simply left click and hold as you move the mouse around to place the product in your desired location.
To rotate the product, left click on it to select it, and then click and hold the ![]() icon next to the product to rotate it. Note that you can move the cursor closer or further from the object, and this will determine the speed at which the product will rotate. The closer the cursor, the faster the object will move.
icon next to the product to rotate it. Note that you can move the cursor closer or further from the object, and this will determine the speed at which the product will rotate. The closer the cursor, the faster the object will move.
Removing a product
To remove a product from your space, simply click on the product to select it, and then left click the ![]() icon that appears next to it.
icon that appears next to it.
Customizing products
To customize a product, select the ![]() icon to open up the customization menu. This menu will appear on the right of the room viewer, taking the place of the product selection menu.
icon to open up the customization menu. This menu will appear on the right of the room viewer, taking the place of the product selection menu.
.png?width=358&height=499&name=Screenshot%20(75).png)
Depending on the product you selected, you will see a variety of options that could include mounting options, bike capacity, finish options, and more.
Simply select your desired features in order for them to take effect. Although you may not see all changes take effect in the 2D view, these changes can be seen in 3D view.
If you want the customization options to affect all products of the same type placed into the room, click the ![]() button at the bottom of the customization menu.
button at the bottom of the customization menu.
To exit the customization menu, either click into the room viewer again, or the ![]() icon at the top of the menu.
icon at the top of the menu.
Copying a product
If you want to duplicate your customized product, select the product by left clicking on it, and pressing the ![]() icon to duplicate. A copy of your product will appear in the closest by open space.
icon to duplicate. A copy of your product will appear in the closest by open space.
3D View
Once you’ve begun to place customized products in your bike room, it’s time to view the room in 3D!
To enter 3D, simple click on the toggle in the upper left-hand corner of the screen. ![]()
You will not be able to edit your room at all from this view, however you have the ability to see within it from any angle.
To see the basic controls of the room, click on the ![]() icon in the bottom right corner of the room viewer.
icon in the bottom right corner of the room viewer.
-1.png?width=263&height=361&name=Screenshot%20(97)-1.png)
-1.png?width=273&height=361&name=Screenshot%20(98)-1.png)
To enter full-screen mode, click the ![]() icon in the bottom right corner of the room viewer. To exit full-screen mode, press the escape key on your keyboard.
icon in the bottom right corner of the room viewer. To exit full-screen mode, press the escape key on your keyboard.
Summary Of Your Work
.png?width=354&height=591&name=Screenshot%20(79).png)
Once you’re done putting your room together, you can share, download, and buy the products that you’ve put into your room.
In the menu to the right of the bike room viewer, select:
![]()
Once in that menu, you can use the ![]() button to email a copy of your room to anyone.
button to email a copy of your room to anyone.
You will also be able to see a 2D rendering of your room and a complete item list of the products you used. Note that this rendering will mimic the look of your room in the edit window, so zoom in or out as needed.
You have the option to download this summary in a PDF file with the ![]() button, as well as the ability to purchase all of your products with the
button, as well as the ability to purchase all of your products with the ![]() button.
button.
If you realize that you aren’t quite done with your bike room or want to change any of the details seen on this page, click ![]() to go back to editing!
to go back to editing!
Conclusion
We hope that you found this tutorial helpful. If you have any questions or need any help figuring out the features of this room, please do not hesitate to reach out to our team either through out chat box on our website or by reaching out to sales@madrax.com.
